Schedulus Student
The “My Schedule” tab allows you to seamlessly navigate through your schedule by selecting the left and right arrows found towards the top of the schedule. Here is a a pro tip: if you ever find yourself hopelessly lost in your schedule, simply select the little green calendar icon in the top right to navigate back to the current week.

Your class schedule can be automatically integrated since Schedulus is a BYU application. Although, your class schedule will not be viewable if your supervisor does not import it before your first login or before a new semester. If this is the case, you can import it by selecting "Import Current Classes."
Blue boxes will represent your shift schedule, and purple boxes will reflect your class schedule.

If you happen to change your class schedule at some point during the semester, no sweat! You can also select "Import Current Classes," to adjust your class schedule. You can either import your classes again, or you can select "Remove Current Classes" to start over.

If you want to get ahead in planning for future semester(s), simply select the option to "Import Future Classes" (you must have already registered for your future classes in order to use this functionality).
You also have the option to "Add Obligation[s]" on your schedule. This refers to any event that would hinder your ability to work on a specific day and time. When the option is selected, simply fill out the information and add the obligation to your schedule. This will then be reflected on your supervisor's schedule, but it is recommended that you still mention the obligation to your supervisor (nothing beats a little human-to-human interaction or a quick email-to-human interaction).

If an obligation is going to occur more than once, you can set it to repeat. For obligations that repeat weekly, select the "Repetition" option and choose "Weekly." Then select which day(s) the obligation will repeat each week. For obligations that repeat monthly, select the "Repetition" option and choose "Monthly." In order to select which days the obligation will specifically occur, select the blue pencil icon below the repetition drop box.
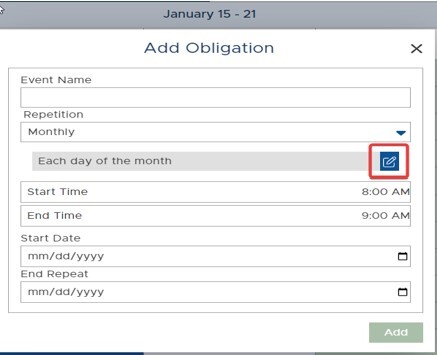
You will then see two options, “Each” and “On the." Select “Each” if the obligation is going to repeat on a specific day of the month (i.e. the fifth and tenth of every month). Or select “On the” if the obligation will repeat on a specific weekday of the month (i.e. every second Tuesday). After making your selection, select the green checkmark at the bottom of the popup box to save.

Make sure to select an "End Repeat" date as well. After all the information is entered, the "Add" button will turn green and can be clicked.