Final Grades
-
Toggle ItemCalculations
How to Create a New Calculation
Instructors can create new calculations (or grading scenarios) in order to help them determine the final grades for their students. After creating the calculations/scenarios, instructors still have the option to choose whether or not to use the calculation as students’ final grade (see Submitting Final Grades).
1. Under Final Grades, click the New calculation button.

2. The New Calculation dialog window will appear:

- Calculation Title: Enter a title for the calculation. This can be used for future reference. For example, if the calculation drops two quiz scores, the user may want to name the calculation "Two Lowest Quizzes Dropped".
- Dropped Scores: For each category, choose to drop the lowest scores from students' final grade. In the Drop Scores column to the right of each category, enter the number of scores to drop for that category.
- Weight Column: Change the weight each category or assignment has on the final grade. (This is only if the course is using weighted categories.)
3. Click the Grade Scale tab. Adjust the scale type and specifications as desired. Click Save.

4. Should multiple calculations be available, the instructor will need to select which calculation they want to use. Click the student’s grade under the correct calculation. It will be highlighted blue.
5. The new calculation will appear as a column in the Final Grades table. Should multiple calculations be available, the instructor will need to select which calculation they want to use.
Class GPA
Learning Suite provides instructors with a Class GPA. This is an average of the entire class’ GPA and is viewable on the Final Grades page.
In Final Grades, the Class GPA is viewable on the right. This calculation is based off the grades in the Final Grades For Submission column.

How to Submit Grades Based on a Distribution
1. Under Final Grades, click the New calculation button above the students’ grades.
2. The New Calculation dialog box appears. Enter a title for your calculation. Select the Grade Scale tab. Change the Scale to Distribution. Next to each grade, enter in the percent of students that will receive that grade. Total must equal 100%. When finished, click Save.
3. Click the drop down arrow next to Final Grades for Submission and select the created calculation.
Note: If any grades were entered manually, Learning Suite provides the option to overwrite or not overwrite the manually entered grades. Select the desired option.
Invalid Calculations Column
Making certain changes in Learning Suite can invalidate calculated columns. Because of this, it is recommended that instructors create all calculated columns at the end of the semester. The following changes can invalidate calculated columns:
- Adding or removing assignments
- Adding or removing categories
- Changing how assignments are graded (i.e. grades assignments, ungraded assignments, extra credit)
If any of these changes are made in Learning Suite and calculated columns are created, the next time they enter the final grades tab an Invalid Calculation Error message will appear. It will specify what calculated column was affected and what change caused the invalidation.
It is recommended that the instructor deletes the calculated column because it is no longer functional. Delete the column by selecting Delete Now. If, however, they want to view the settings before the calculated column is deleted, select Delete Later. This would then require them to delete the column manually by clicking the drop down arrow next to the title and then selecting Delete Calculation.
-
Toggle ItemSubmit
Learning Suite is fully integrated with AIM and includes a one-click final grades submission process.
1. Click Final Grades in the Grades navigation menu under BYU Grades.
2. Review the grades listed to determine if they are accurate. Grades can be changed in the Final grades for submission column.

3. Click the green Submit final grades button.
4. If any students are assigned an E or T grade, a dialog box will show indicating when a student last attended or submitted work for the course. This information is needed for processing federal grant or loan paperwork. Learning Suite populates its best guess, but the instructor must verify and change the date if necessary. If the student never attended, check the NO button. If the instructor is not sure, choose "I don't know." Click Save when complete.

5. Another dialog window will appear. Choose whether students may view their grades on Learning Suite after the grade submission deadline or if they are permitted to view their grades on Learning Suite immediately. Click Save.

6. A dialog window will appear confirming the submission process has successfully been started. The instructor will also be sent an e-mail upon completion of the grade submission process. Click OK.

Note: Grades can continued to be adjusted and resubmitted until the grade submission deadline by editing students’ grades and clicking Resubmit. Follow the same process.
Check Final Grade Submission
The status of the grade submission process can be viewed under Submission Status. If there is an error, a message will be displayed and the details for correcting the error can be viewed by clicking Error Summary.

The OIT Service Desk can also check the status of final grade submissions at the end of the semester. For assistance, contact the OIT Service Desk at 801.422.4000 or it@byu.edu.
-
Toggle ItemIncomplete Grades (I)
Learning Suite does not currently support submitting the letter grade I (incomplete) during final grade submission.
If an instructor needs to give a student an incomplete grade (I), the instructor should submit whatever grade the student has earned thus far (even if it is an E.). The instructor and student need to go to https://enrollment.byu.edu/registrar/incomplete-contracts and follow the instructions there. The Registrar's Office will review the Incomplete Contract and will override the grade in AIM as part of that process. Please contact the Registrar’s Office for any questions about Incomplete grades.
Additional Information about Incomplete Grades:
An I is given on a contractual basis with the instructor to students who are unable to complete work by the end of the semester or term. An incomplete grade may be given for nonacademic extenuating circumstances (serious illness, personal injury, death in the immediate family, etc.) that arise after the discontinuance deadline (the twelfth week of a semester or the sixth week of a term).
To be eligible for an incomplete, the student must have attended up until the discontinuance deadline and be passing the class. If extenuating circumstances arise before the discontinuance deadline, the student should discontinue or petition through the Registrar's Office to be officially withdrawn from the class(es).
The Incomplete Grade Contract should be completed and signed by the instructor before submission of the official grade roll at the end of the semester. A copy of the Incomplete Grade Contract must be submitted to the Registrar's Office. A grade of E will be posted until a valid Incomplete Grade Contract is submitted to the Registrar's Office.
Class attendance in a subsequent semester or reregistration is not permitted to make up the incomplete. In some special instances, such as a lab class, attendance may be required for the portion of the class or lab section missed.
Once all the work has been completed, the instructor should complete the portion of the Incomplete Grade Contract, showing the grade earned, and submit the form to the Registrar's Office (B-150 ASB).
The instructor may designate the specific length of time the student has to complete the course requirements (not to exceed one year). If the work is not completed and the new grade submitted by the instructor within the agreed upon deadline, the I grade will be changed to an IE (the IE grade is considered and calculated as a failing grade). (To extend the contract date within the one-year deadline contact the Registrar's Office, B-150 ASB.)
Last Date of Student Activity
After clicking "Submit Final Grades" the instructor may get a pop up window asking them to indicate whether students receiving an “E” or "T" grade in the course attended or completed work. Learning Suite makes its best guess, by using the last date the student interacted with Learning Suite or attended class. Verify the date and change if needed. Instructors can also select No (if they never attended) or "I don't know" (if they are not sure).
For more information on finding when the students last accessed the course, click here.
For assistance, contact the IT Help Desk at 801.422.4000 or it@byu.edu.
-
Toggle ItemExport/Import Final Grades
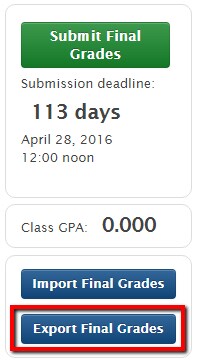
Export Final Grades
Instructors can export final grades in a .csv or .txt file. The entire final grades table, including a Net ID column located to the right of the First Name column, is exported.
1. Under BYU Grades, click Final Grades in the Grades navigation menu.
2. Click the Export Final Grades button.
3. A dialog window will appear. Select whether to export as .csv or export as .txt. Click Export.
4. A dialog window will appear. Find a location in the computer to save the file and click Save.
Import final grades from a .csv file
1. Create a .CSV file for the course. For proper importing, the first row of the file must be a header row, meaning that it should include the labels for each column. For example, if the first column is students’ Net IDs, the first row should be titled “Net IDs.”
Note: The grades in the CSV file need to be letter grades. Any other information (such as numbers or percentages) are not compatible with importing grades to Learning Suite.
2. Under BYU Grades, click Final Grades in the Grades navigation menu.
3. Click the Import Final Grades button.

4. A dialog window will appear. Click Choose File and then locate and select the .csv file within the computer.
5. If the .csv file is in the correct format, the instructor will be shown a preview of the table in the .csv file. Select the column that contains student Net IDs or BYU IDs. Select the column that contains the final grades for submission. Click Import.
A dialog window will display if all scores were imported successfully or if there were any errors. The imported grades will be listed under the Final Grades for Submission column on the Final Grades page.
-
Toggle ItemCommon Issues
Why Final Grades May Differ from BYU Grades
Instructors may notice differences between the final scores page and the BYU Gradebook. This occurs because the Overall Score column in BYU Grades does not take into account ungraded assignments whereas the Final Grades page automatically assigns zeros to ungraded assignments. In BYU Grades, ungraded assignments are displayed with a dash.
If instructors have any ungraded assignments, the Final Grades page will differ from BYU Grades.
-
Toggle ItemCalculations (Legacy)
How to Create a New Calculation
Instructors can create new calculations (or grading scenarios) in order to help them determine the final grades for their students. After creating the calculations/scenarios, instructors still have the option to choose whether or not to use the calculation as students’ final grade (see Submitting Final Grades).
1. Under Final Grades, click the + New Calculation button.

2. The New Calculation dialog window will appear:

- Calculation Title: Enter a title for the calculation. This can be used for future reference. For example, if the calculation drops two quiz scores, the user may want to name the calculation "Two Lowest Quizzes Dropped".
- Set Unscored Assignments to Zero or Excuse Unscored Assignments: Select the desired option.
- Weight Column: Change the weight each category or assignment has on the final grade. (This is only if the course is using weighted categories.)
- Dropped Scores: For each category, choose to drop the lowest scores from students' final grade. In the Drop Scores column to the right of each category, enter the number of scores to drop for that category.
3. Click the Grade Scale tab. Adjust the scale type and specifications as desired. Click Save. The new calculation will appear as a column in the Final Grades table.
 Photo by Sarah Post
4. Should multiple calculations be available, the instructor will need to select which calculation they want to use. Click the student’s grade under the correct calculation. It will be highlighted yellow.
5. Click the X in the Final Grades For Submission column to automatically select the calculation with the highest grade for the student.
Class GPA
Learning Suite provides instructors with a Class GPA. This is an average of the entire class’ GPA and is viewable on the Final Grades page.
In Final Grades, the Class GPA is viewable on the right. This calculation is based off the grades in the Final Grades For Submission column.

How to Submit Grades Based on a Distribution
1. Under Final Grades, click the +New calculation button above the students’ grades.
2. The New Calculation dialog box appears. Enter a title for your calculation. Select the Grade Scale tab. Change the Scale to Distribution. Next to each grade, enter in the percent of students that will receive that grade. Total must equal 100%. When finished, click Save.
3. Click the drop down arrow next to Final Grades for Submission and select the created calculation.
Note: If any grades were entered manually, Learning Suite provides the option to overwrite or not overwrite the manually entered grades. Select the desired option.
Invalid Calculations Column
Making certain changes in Learning Suite can invalidate calculated columns. Because of this, it is recommended that instructors create all calculated columns at the end of the semester. The following changes can invalidate calculated columns:
- Adding or removing assignments
- Adding or removing categories
- Changing how assignments are graded (i.e. grades assignments, ungraded assignments, extra credit)
If any of these changes are made in Learning Suite and calculated columns are created, the next time they enter the final grades tab an Invalid Calculation Error message will appear. It will specify what calculated column was affected and what change caused the invalidation.
It is recommended that the instructor deletes the calculated column because it is no longer functional. Delete the column by selecting Delete Now. If, however, they want to view the settings before the calculated column is deleted, select Delete Later. This would then require them to delete the column manually by clicking the drop down arrow next to the title and then selecting Delete Calculation.
-
Toggle ItemSubmit (Legacy)
Learning Suite is fully integrated with AIM and includes a one-click final grades submission process.
1. Click Final Grades in the Grades navigation menu under BYU Grades.
2. Review the grades listed to determine if they are accurate. Grades can be changed by clicking the student’s grade under the Final Grades For Submission column and entering ‘A’, ‘A-’, ‘B+’, ‘B’, ‘B-’, etc.

3. Click the green Submit Final Grades button.
4. If any students are assigned an E or T grade, a dialog box will show which asks to indicate when a student last attended or submitted work for the course. This information is needed for processing federal grant or loan paperwork. Learning Suite populates its best guess, but the instructor must verify and change the date if necessary. If the student never attended, check the NO button. If the instructor is not sure, choose "I don't know." Click Save when complete.

5. Another dialog window will appear. Choose whether students may view their grades on Learning Suite after the grade submission deadline or if they are permitted to view their grades on Learning Suite immediately. Click Save.

6. A dialog window will appear confirming the submission process has successfully been started. The instructor will also be sent an e-mail upon completion of the grade submission process. Click OK.

Note: Grades can continued to be adjusted and resubmitted until the grade submission deadline by editing students’ grades and clicking Resubmit. Follow the same process.
Check Final Grade Submission
The status of the grade submission process can be checked under Submission Status. If there is an error, a message will be displayed and the details for correcting the error can be viewed by clicking Error Summary.

The OIT Service Desk can also check the status of final grade submissions at the end of the semester. For assistance, contact the OIT Service Desk at 801.422.4000 or it@byu.edu.